Installation
Once the download completes, you must install the profile.
-
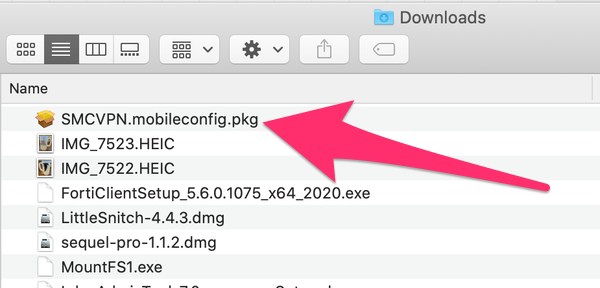
Find the downloaded file SMCVPN.mobileconfig.pkg on your computer.
It may be saved to your computer's Desktop, to your Downloads folder, or other location you may have specified.
You may be able to find the installer by seeing it listed in your web browser's download history.
-
Double-click the icon to launch the installer.
-
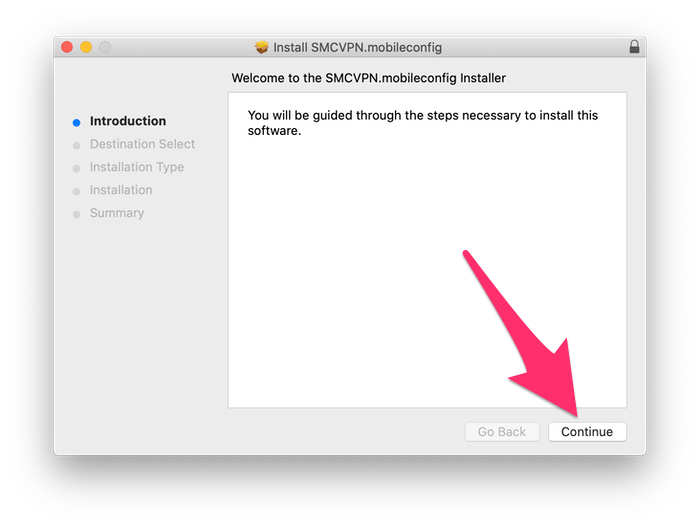
You will see the welcome screen. Click "Continue".
-
You MAY see a window that asks you to select a destination for the install. If you do, make sure your system disk is selected by clicking on it. It is typically called "Macintosh HD", and should be the first disk listed.
Then click "Continue".

-
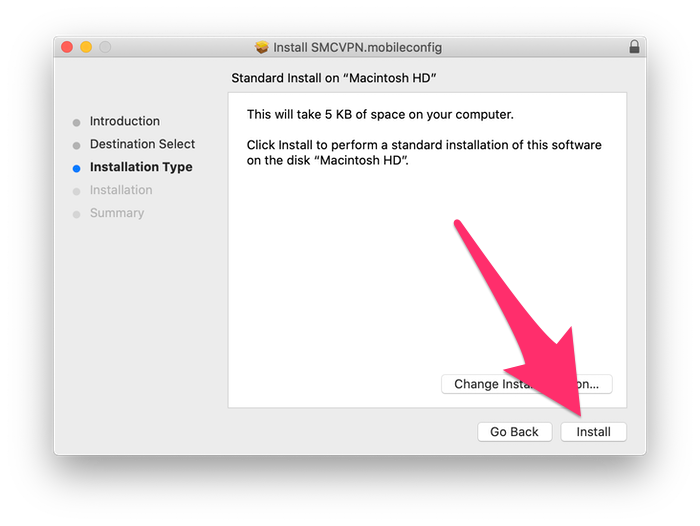
In the next screen, click the "Install" button. Do not change the install location.
-
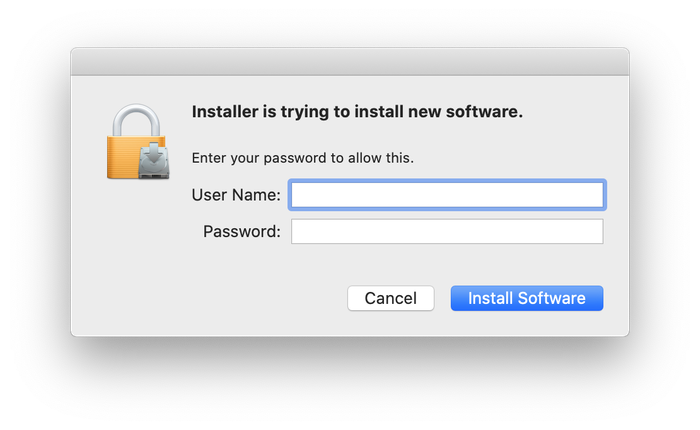
As with any other application installer, you are required to have administrator privileges. A new dialog box will
appear requesting those credentials. The username may already be filled in. If not, type the username you use to log into
your computer. Enter the password you use to log into your computer. Click "Install Software".
-
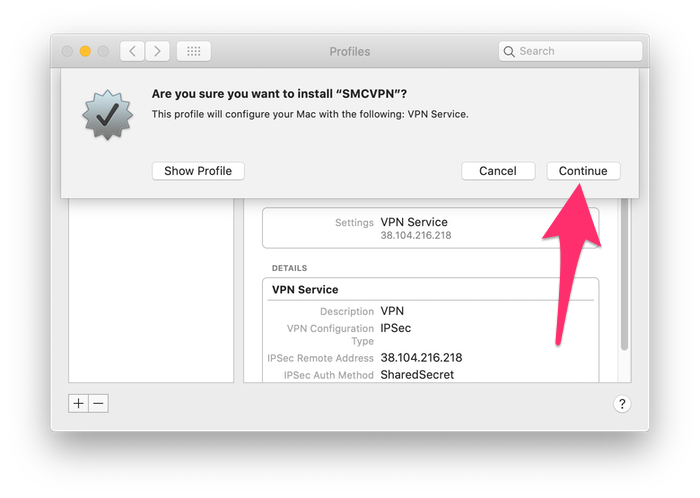
This will bring up your System Preferences, Profiles pane with a dialog requesting permission to install the
SMC-Student-VPN-Connection profile. Click "Continue".
-
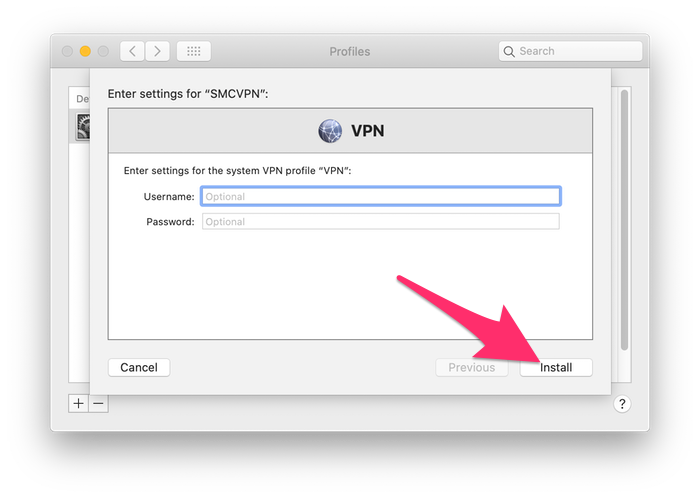
Next you will see a dialog where you can enter your settings for the VPN profile.
This is optional. If you choose to do so, you may put in your username and password (your SMC network account username and password).
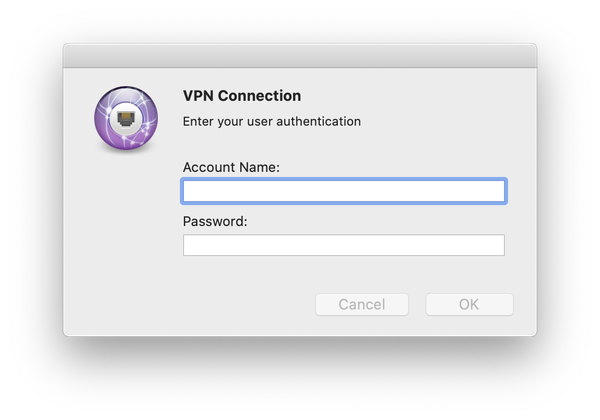
If you leave these blank, you will be prompted for your username and password whenever you connect to the VPN.
As a general rule of thumb, this is not recommended as it poses a security risk if the computer was stolen.
You can however enter your username only so that you are prompted for the associated password each time you
connect to the Saint Mary’s network.
Click Install.
-
Next you will see a dialog stating that Profiles wants to make changes.
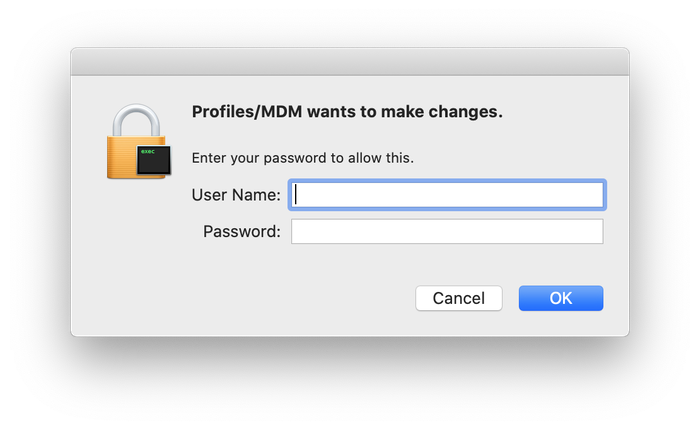
As before, you are required to have administrator privileges. A new dialog box will appear requesting your credentials.
The username may already be filled in. If not, type the username you use to log into your computer. Enter the password you use to log into your computer.
-
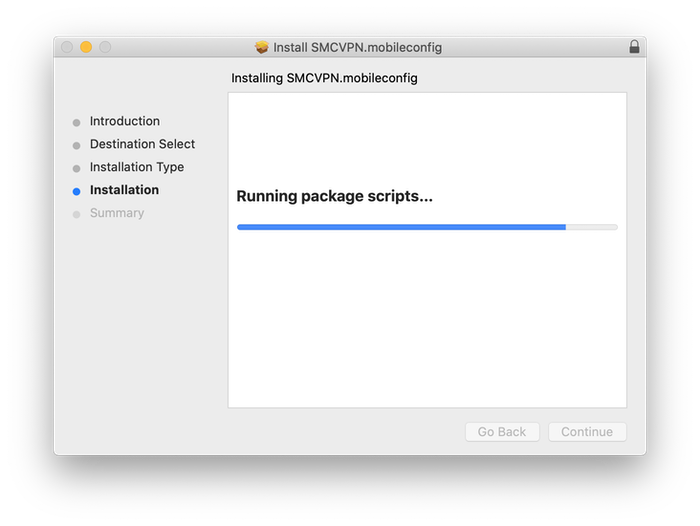
Wait while the installer is working.
-
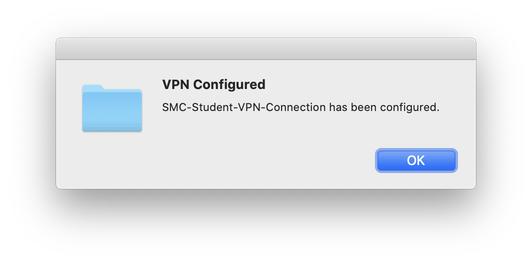
You may also see an alert appear that tells you that the VPN has been configured. Click OK to dismiss it.
-
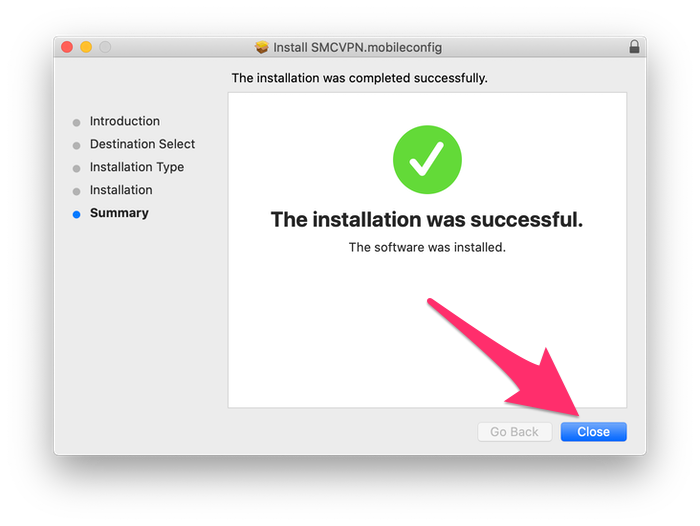
When the installer finishes, quit it by clicking the Close button.
-
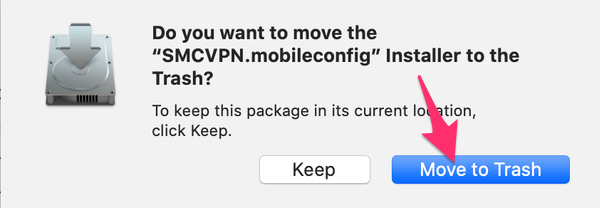
You will be asked if you wish to have the installer package moved to the trash. Click on "Move to Trash" unless you have a compelling reason to keep the package.
-
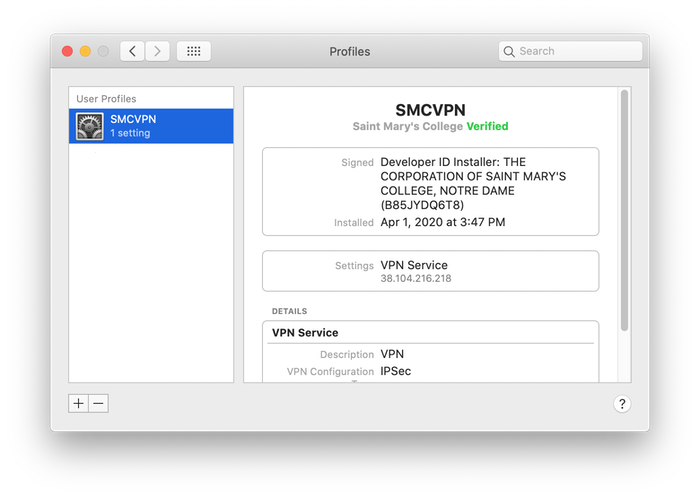
You will now see the Profile installed. Quit System Preferences.
What do I do now?
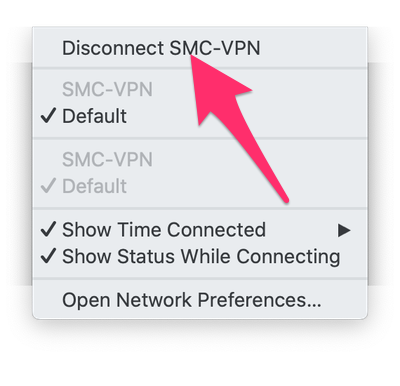
Now that you are connected via the VPN, you can access various campus-only or restricted resources.
Connecting to file servers
Other Services
- Online Phonebook
- Saint Mary's Portal
- If you are using a College-owned machine, you can run license-controlled software when connected via the VPN. These include:
- Maple
- MatLab
- Spartan
- SPSS
NOTE: License-controlled software is subject to availability of shared licenses.
These licenses are shared by on-campus users as well as VPN users.
- If you wish, you can print to network printers on campus when connected via the VPN.